This article was originally published on Botium’s blog on February 23, 2022, prior to Cyara’s acquisition of Botium. Learn more about Cyara + Botium
From traditional IVR systems, still very common in customer service, to voice assistants on Alexa or Google Assistant — voice technology is nowadays part of everyday life, and it will continue to gain importance in the future. The component stack of a typical voice assistant includes speech recognition and speech synthesis, apart from the usual conversational components like NLU (natural language understanding), dialogue management, and NLG (natural language generation).

Conversational AI and Voice
Botium Box enables companies to implement a holistic test strategy for voice assistants on all levels of the component stack. This article focuses on the speech recognition part and shows how to build a regression test suite based on audio files, transcription files, and word error rate verification.
Continuous Speech Recognition Testing
The big cloud service providers Google, Amazon, Microsoft, and IBM all provide high-quality speech services with the best recognition rates on the market. But even with those cloud providers, some make it possible to add your own optimizations by uploading additional training data — this is often used for improving recognition rates for domain-specific vocabulary. Apart from the big cloud service providers, there are also a number of free software packages available like Kaldi (for speech recognition) or MaryTTS (for speech synthesis), which companies install, train, and operate on their own infrastructure.
Continuous speech recognition testing has the most benefits for voice assistants using an optimized cloud speech service or completely self-trained language models. As part of a voice assistant test strategy, the quality of the speech recognition should be verified continuously, as all the other stack components. This article will show how to set up a continuous speech recognition test suite.
Configure Speech Services in Botium Box
In Botium Box, switch to the Voice Services section in the Settings menu (from the user icon on the top right).
Speech Recognition (Speech-To-Text)
In the Speech Recognition list, we register the speech service (including credentials) and the language and to use. Depending on the speech service there are additional parameters required — for example, for cloud services like Google the credentials are required.
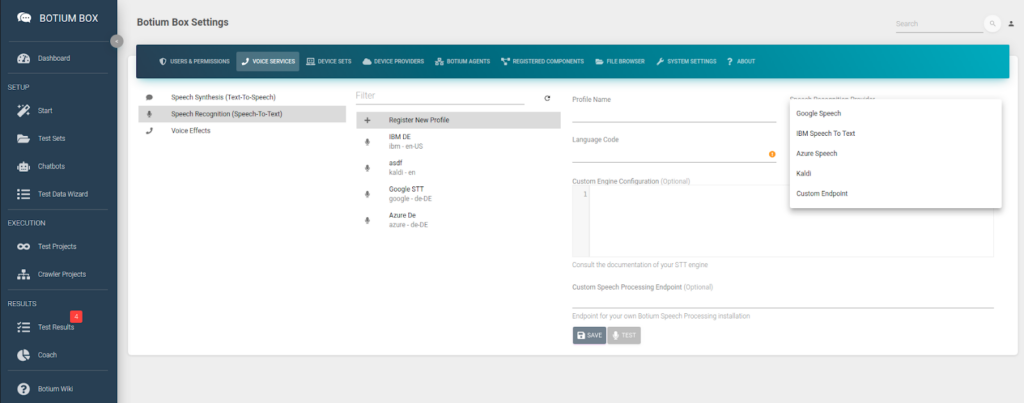
Botium Box allows very fine-grained control over how the speech service is used with the Custom Engine Configuration field. For example, to select your own customized Azure speech model: {"speechConfig":{"endpointId":"xxx-yyyy-zzzzzzzzzz"}}
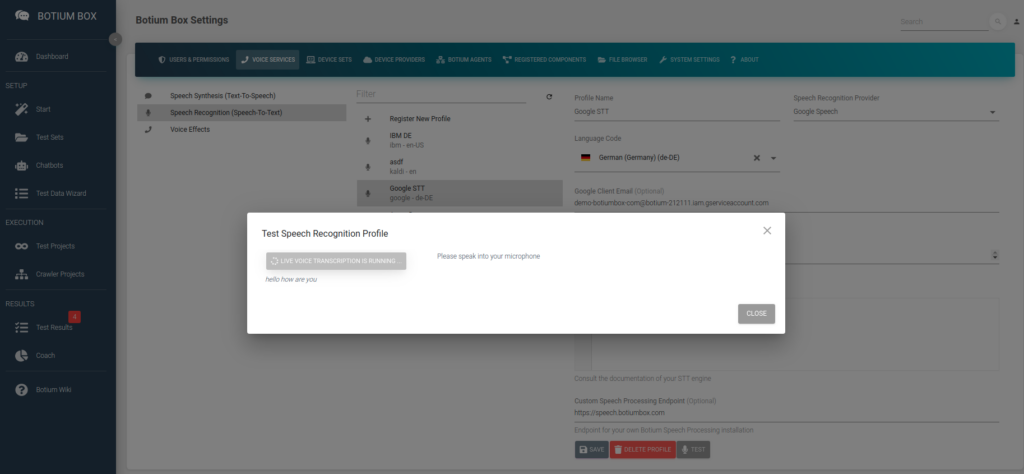
It is possible to immediately test the speech service configuration by using your own microphone.
Speech Synthesis (Text-To-Speech)
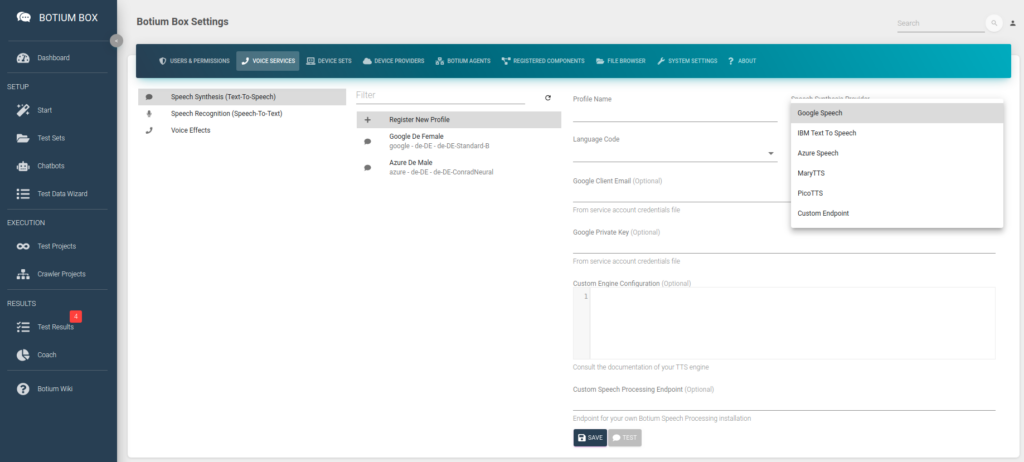
In the Speech Synthesis list, we register the speech service (including credentials), the language, and the voice to use for synthesizing audio from text. Depending on the speech service there are additional parameters required — for example, for cloud services like Google the credentials are required.
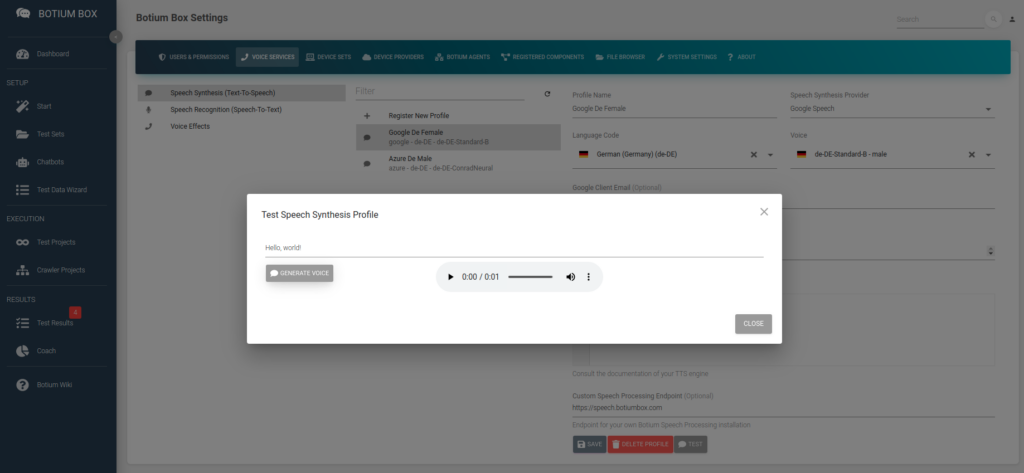
Again, you can test the configuration by listening to the first example.
Custom Speech Engines
Botium Box is using the open-source Botium Speech Processing software stack (see Github project). By using the Github source code as a base it is possible to add your own custom speech recognition or speech synthesis as well as voice effects to your Botium tests. Be prepared to do some Node.js coding!
Prepare Chatbot for Speech Synthesis and Recognition
Next, we will create a chatbot in Botium Box with the Speech Synthesis & Recognition connector. In the Chatbots section, register a new chatbot, select the technology from the list, and the previously configured speech recognition and speech synthesis profiles.
The Speech Synthesis & Recognition connector is a very slim Botium connector that is capable of doing simple 2-step conversations:
- use a pre-recorded audio file or synthesize an audio file for a given text with a given voice
- send this audio file to the speech recognition engine and show the text results and WER
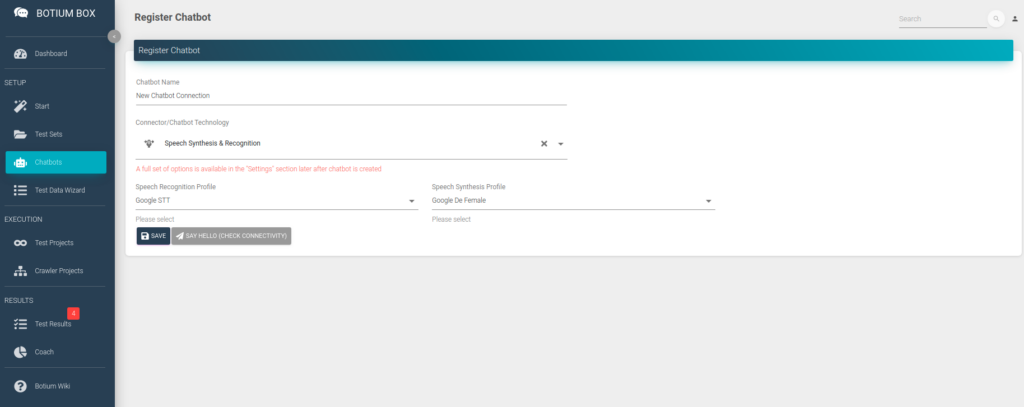
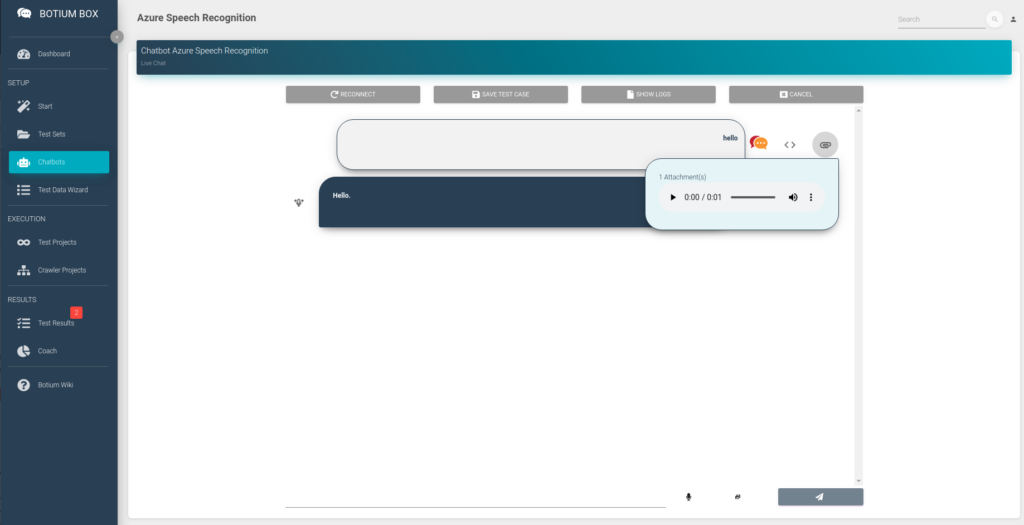
The configuration can be tested immediately with the Say Hello or even with the Live Chat. You can either enter some text in the live chat for which voice will be synthesized, or you can record your own voice as well.
Prepare Test Set
As the next step, we have to prepare a Test Set. A Test Set in Botium Box is the container for the test data itself as well as the configuration of how to interpret the test data to inject it into the Botium testing pipeline.
Usually, in Botium Box test cases are defined in the scripting language BotiumScript, conversation flow tests as well as NLP tests and other test types supported by Botium. In the case of speech recognition testing, it is not required to use BotiumScript: for testing speech recognition labeled audio files are sufficient to build up the test cases.
- Audio files have to be uploaded as wav or mp3 files to Botium Box
- Botium looks up the expected transcription …
- in a file with the same name but with extension .txt instead
- in a CSV file transcript.csv
- from the file name itself
In the Test Sets menu, create a new Test Set and navigate to the Media Resources Settings. In the Audio File Usage field select the option Use all audio files as Test Case input and read transcription from a file.
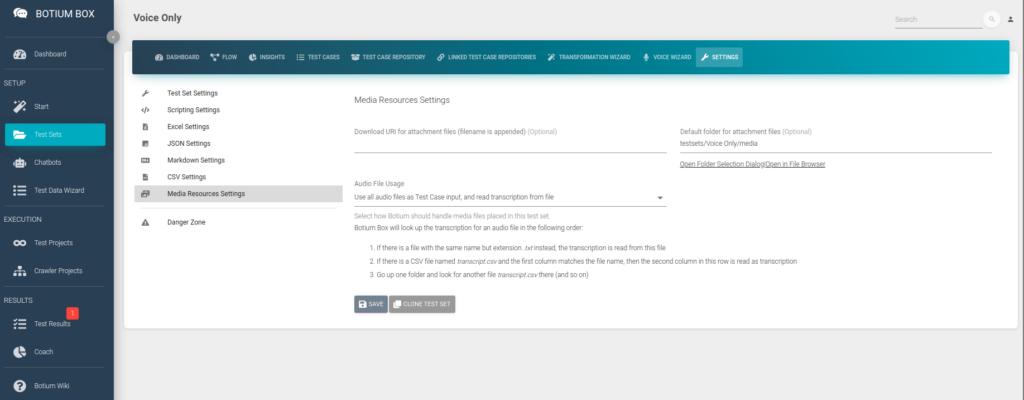
The Default folder for attachment files is the folder in Botium Box where we will place our test audio files in the next steps. You can navigate there by clicking on Open in File Browser to show a now still empty folder in the Botium Box File Browser.
Gathering Test Data
As always, a test strategy is only as good as the quality of the test data. Depending on your goals there are some ways to gather test data.
Labeled Reference Audio Files
If you are working on your own voice assistant you most likely already own reference data in the form of labeled audio files (audio file + expected transcription). Botium expects the expected transcription in a separate text file named after the audio file, or in a separate CSV file.
For example, consider there are a couple of labeled audio files:
- F01-hello-how-are-you.wav, expected transcription “hello how are you”
- F02-hi-whats-up.wav, expected transcription “hi what’s up”
In Botium Box, open the Default folder for attachment files of the Test Set you created above in the File Browser.
- Upload the two audio files
- do either of the following
- Place two additional text files in this folder
- F01-hello-how-are-you.txt with text content “hello how are you”
- F02-hi-whats-up.txt with text content “hi what’s up”
- Or place a file transcript.csv in this folder
- you can prepare this file with a text editor or with a spreadsheet, like Excel
F01-hello-how-are-you.wav;hello how are you
F02-hi-whats-up.wav;hi whats up
Now Botium knows what to expect when sending the audio file to the speech recognition engine.
Synthesizing Speech
Another way to start testing your speech recognition is to synthesize audio files from text. Botium Box has the Voice Wizard to support you in doing so. Paste the text for which to generate the audio files, select the voices you want to use and the output folder. The Voice wizard will place the audio files as well as the transcription files right there.
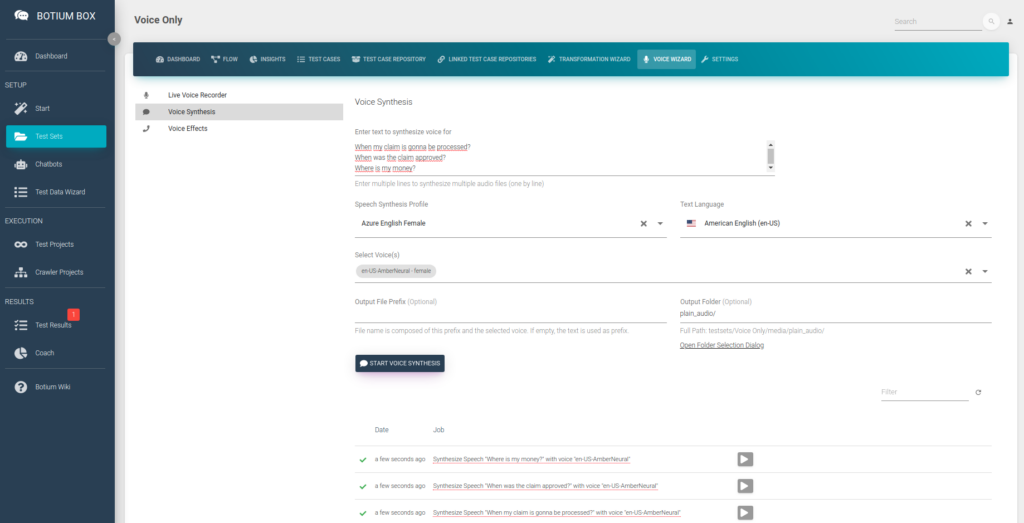
When opening the folder now in the File Browser, you can see a bunch of audio files — one for each line of text and voice — as well as one transcription file per audio file, ending in .txt.
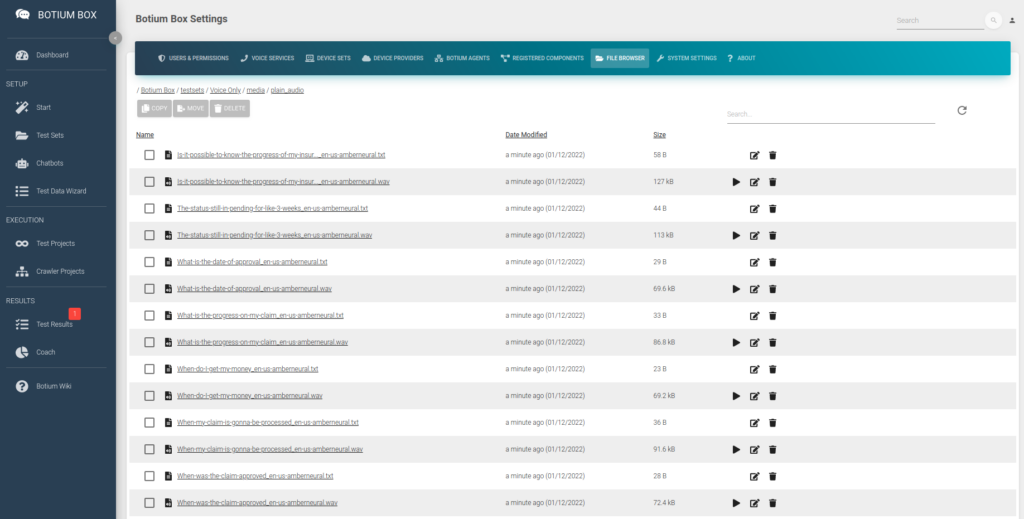
This is by far the quickest way to generate audio test data en masse.
Record Speech
For smaller-scale projects, it might also be feasible to record your own voice and use it for testing speech recognition. The Voice Wizard also has the option to record an audio file and place it in the Test Set folder.
You will have to add the transcription files manually if choosing this option.
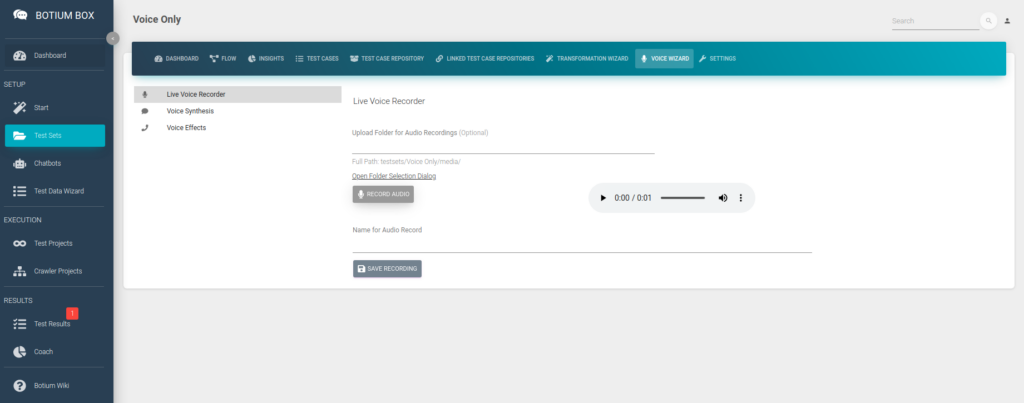
Run Speech Recognition Test Session
Now that we have everything in place for a first test run — the connection to our speech recognition engine and the labeled test data — we run the first test. For this we create a Test Project — in the Test Projects menu, register a new Test Project, select the Chatbot and the Test Set we created in the previous steps and click on Save.
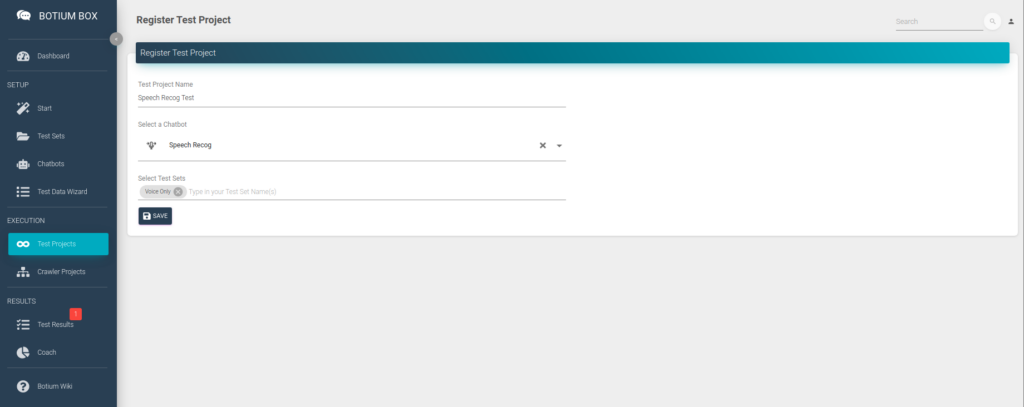
Now click on Start Test Session Now to start the first test session. A few minutes later you can already start to inspect the results.
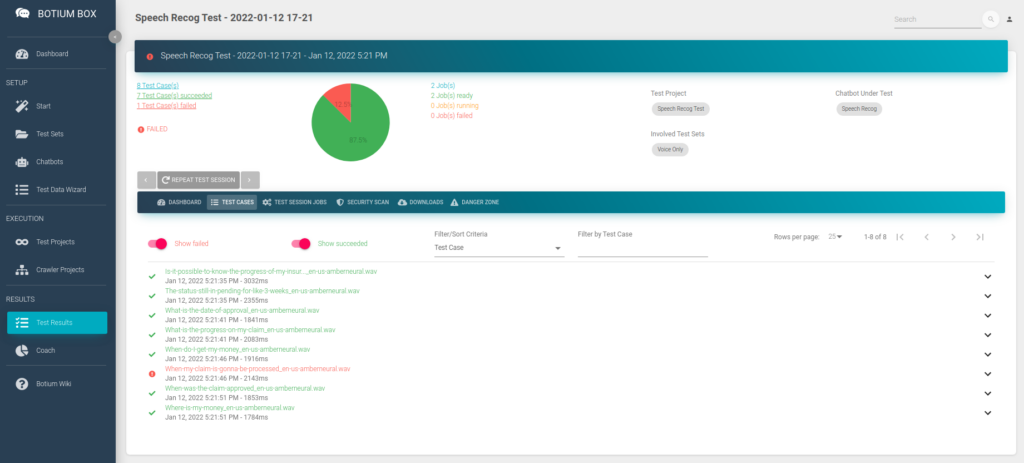
You can see the list of audio files where the speech recognition matched the expected transcription and the ones where it failed. You can dive into the results, listen to the audio files, and view the result details on a JSON code level (use the <> button).
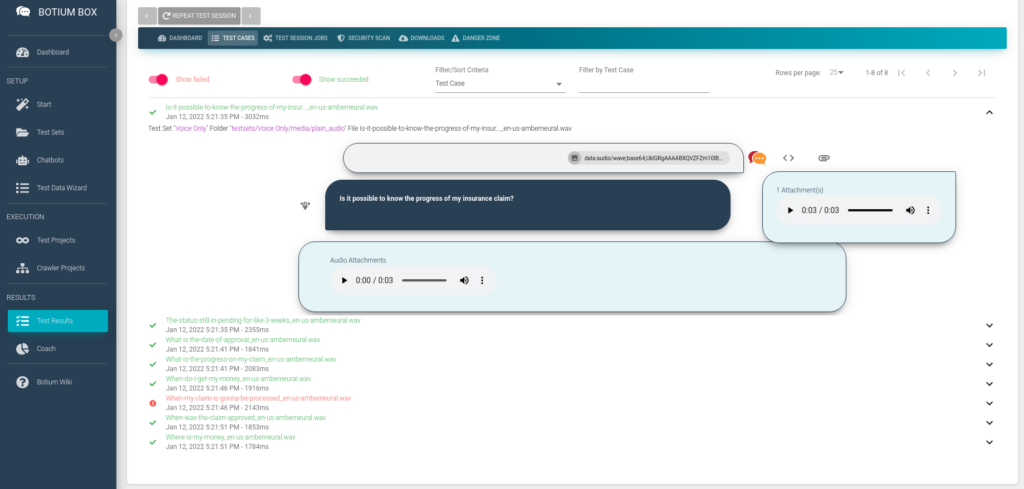
As expected, most of the tests pass now, as we are using the best quality audio files we can get — labeled reference data, your own voice recordings, or even synthesized voice, which is per definition extremely clean. We can now add some noise to the audio files to challenge the speech recognition with real-life scenarios.
Humanification: Adding Noise
In Botium Box, the term Humanification is used to describe the application of algorithms to introduce noise into the test data. For text-based testing, this means to consider typical human behavior patterns and typical human flaws like typographical errors, case insensitivity, whitespaces (or lacking of whitespaces), using emojis, and others. For voice-based testing, noise can be indeed noise — like adding some environment-specific background noise.
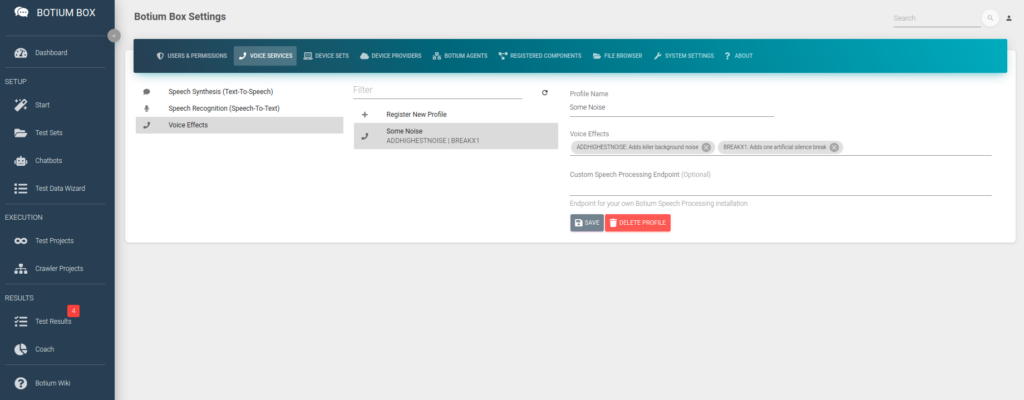
Voice Effects Pipeline
Switch to the Voice Services section in the Settings menu (from the user icon on the top right). In the Voice Effects list, you can configure your pipeline of additional noise layers to apply to an audio file. There are several common audio effects available to simulate real-life environments:
- Adding background noise
- Make it sound like a low-bandwidth GSM phone call
- Simulate a slightly interrupted phone line by adding breaks
- … and more
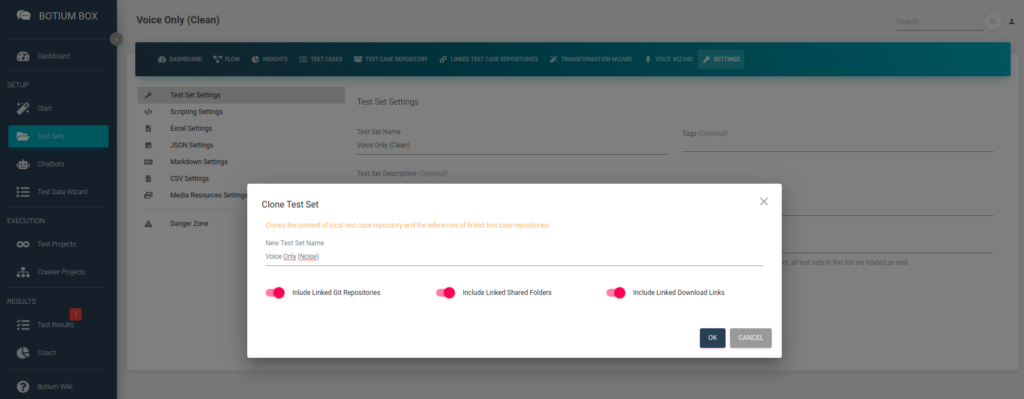
Clone the Test Set from above and add something with “Noise” to the name. This Test Set is initially empty but has the same settings as the above.
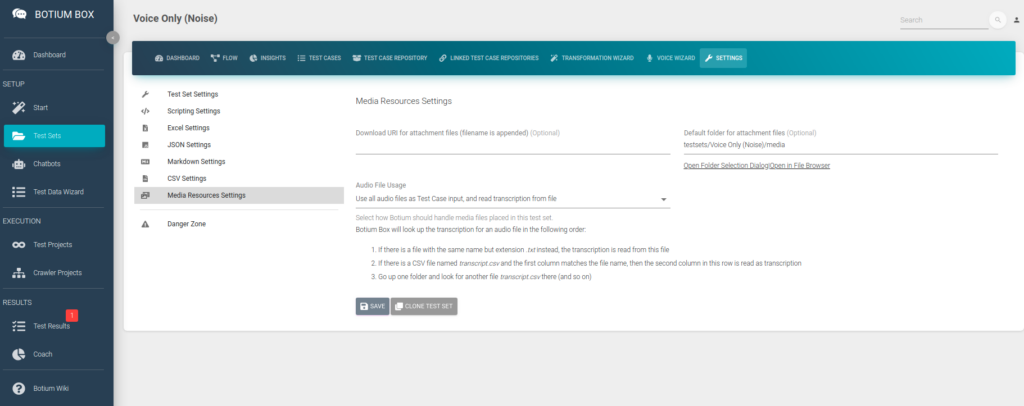
Verify that the Audio File Usage field is indeed set to Use all audio files as Test Case input, and read transcription from a file.
Apply Noise Effects
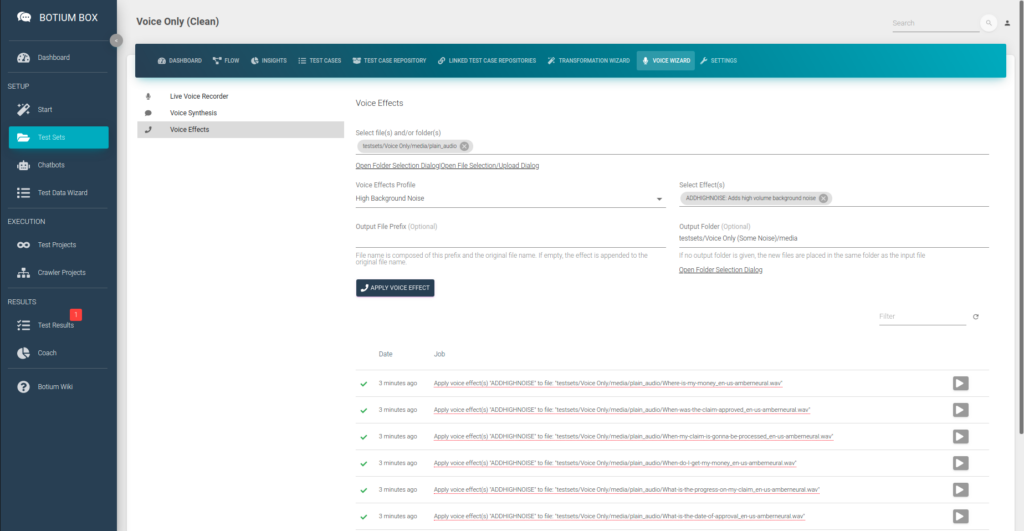
In your clean Test Set, open the Voice Effects section in the Voice Wizard. Select the folder where you placed your audio files before and select the noise profile from above. In the Output Folder, select the media folder from your new noise Test Set you created in the previous step. When clicking on Apply Voice Effect, Botium Box will run all of the audio files in the selected folder (including subfolders!) through the voice effect pipeline and place the resulting audio files in the output folder.
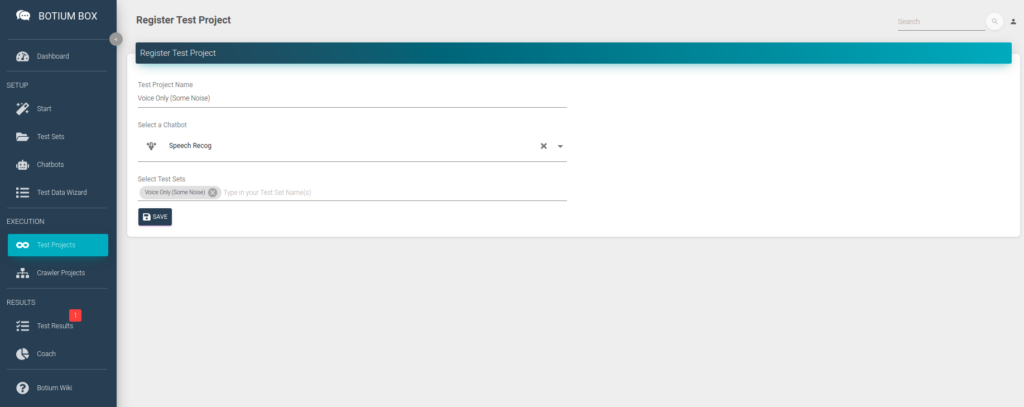
Now create a new Test Project for the new Test Set with noise, and start a first test session.
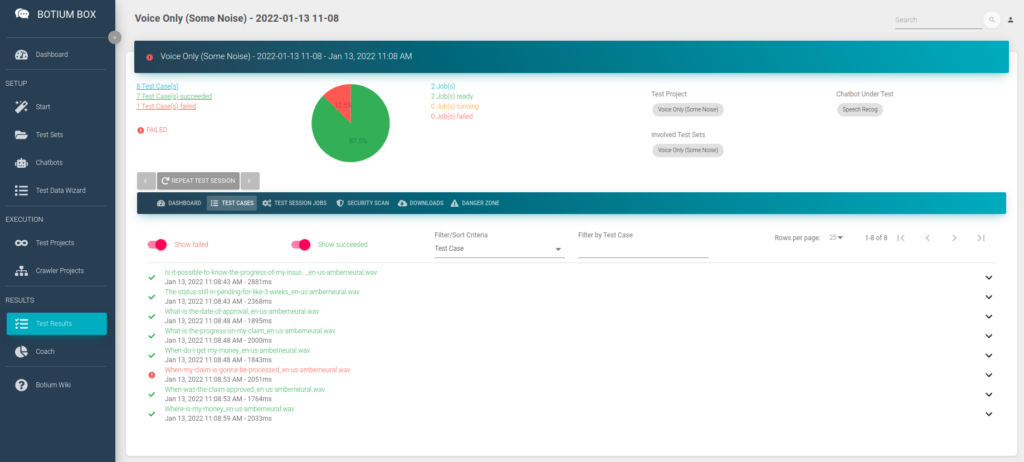
Again, you can inspect the test results after a few minutes to check if the applied noise makes the speech recognition struggle.
Congratulations, you can now run the speech recognition tests with your reference data and with the noisy data over and over again — it makes most sense when you retrain your speech recognition of course.
Bonus: Check Word Error Rate
In many cases, you might not actually be interested in the exact transcription of the audio file, but rather if certain quality criteria about the transcription are met — this is where the word error rate comes into play. It’s a measure of how many words in a single transcription have been recognized correctly — for a perfect transcription fully matching the label it is 0, and the value is between 0 and 1. Depending on your requirements you might consider a word error rate of 0.1 (one wrong transcription out of 10 words) ok. Botium Box can verify the word error rate on a single utterance level instead of the exact transcription.
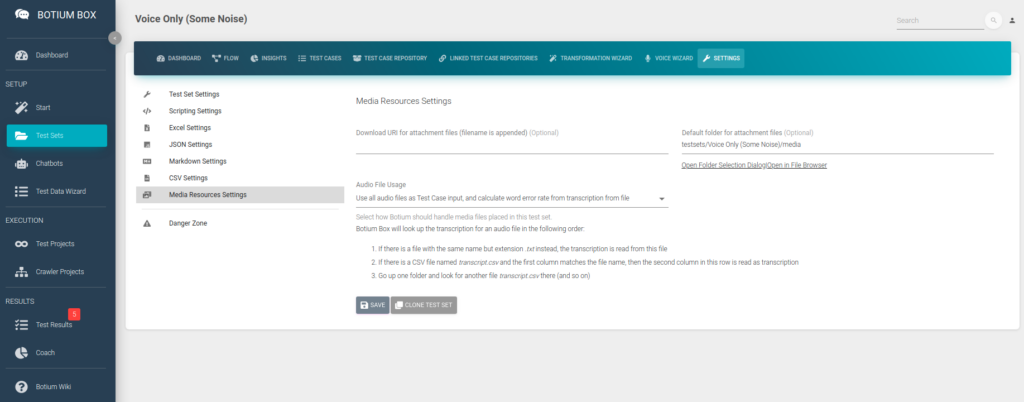
First, switch the value of Audio File Usage in the Test Set settings to Use all audio files as Test Case input, and calculate word error rate from transcription from file — this will Botium instruct to calculate the word error rate, instead of asserting on the exact transcription.
Currently, there is no special Word Error Rate asserter in Botium Box, but we can tailor the Generic JSONPath Asserter for doing this. In Botium Box, in the Settings menu open the Registered Components section. Register a new component there, name it Check WER, and select Test Case Asserter as Component Type.

As Component Ref Code, use WER, and in the Component Source field enter JsonPathAsserter. This will instruct Botium to use the Generic JSONPath Asserter for this component. Enable the switch Register as global scripting component to make Botium use this asserter for all test cases. Finally, in the Component Configuration, we tell Botium the JSONPath expression which we expect to match the speech recognition response.
If we expect a perfect word error rate of 0, we can enter this expression: {"path": "$.response..[?(@.wer == 0)]"}
If we are fine with a word error rate of exactly or below 0.1, this is the expression to use:{"path": "$.response..[?(@.wer <= 0.1)]"}
We now have to tell Botium Box to use this asserter in our tests. Save the registered component, and navigate to your Test Project. Open the Test Execution section in Settings, and add the Check WER component to the Involved Registered Component(s) field.
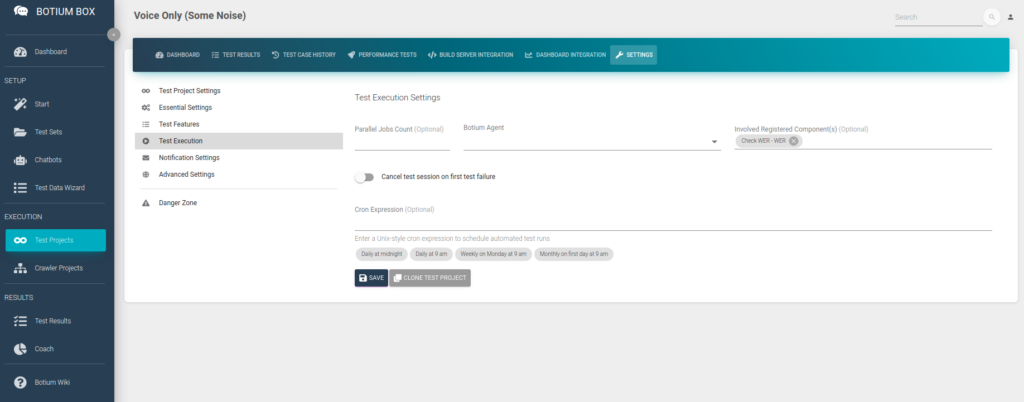
When now running a test session, Botium will not assert on the exact transcription anymore, but it will instead use the Check WER asserter to fail a test case if the word error rate is above 0.1 — you can inspect the detailed results in the test session again:
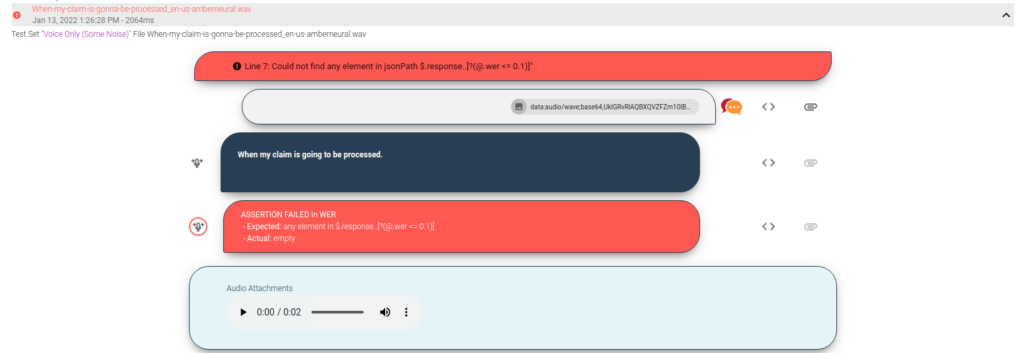
Bonus: Speech Recognition Regression Tests
When regression testing a speech model, often the word error rate itself is not the main criteria — but to make sure that the transcription for some reference audio files is always the same, before training a new speech model and afterwards. With this, it is possible to tell if the newly trained speech model has any obvious defects.
In these cases, you most likely have a library of reference audio files, labeled or unlabeled. In this use case, we can start with the unlabeled audio files to build up a regression test suite.
- Create a new Test Set, set the Audio File Usage to Use all audio files as Test Case input
- Upload your unlabeled audio files to the media folder of this Test Set
- Start a first test session — Botium Box will send all the audio files to the speech recognition engine and accept any transcription
- In the Downloads section of the test result, download the full transcript as CSV file and open it in Excel
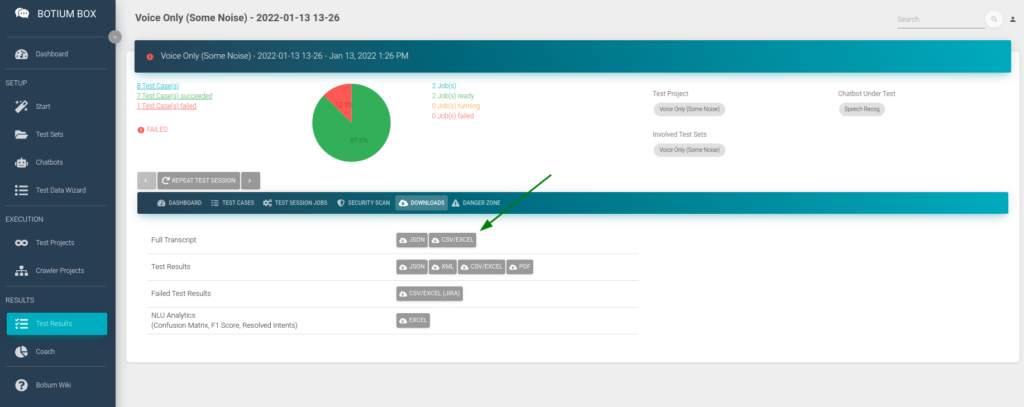
In this CSV file, we are only interested in the columns named testCaseName (which contains the file name) and convoStepActual (which contains the transcription). Filter the convoStepSender column on the value bot and hide all other columns except the two mentioned ones. Copy the remaining data as file transcript.csv to the folder with your audio files in Botium Box.
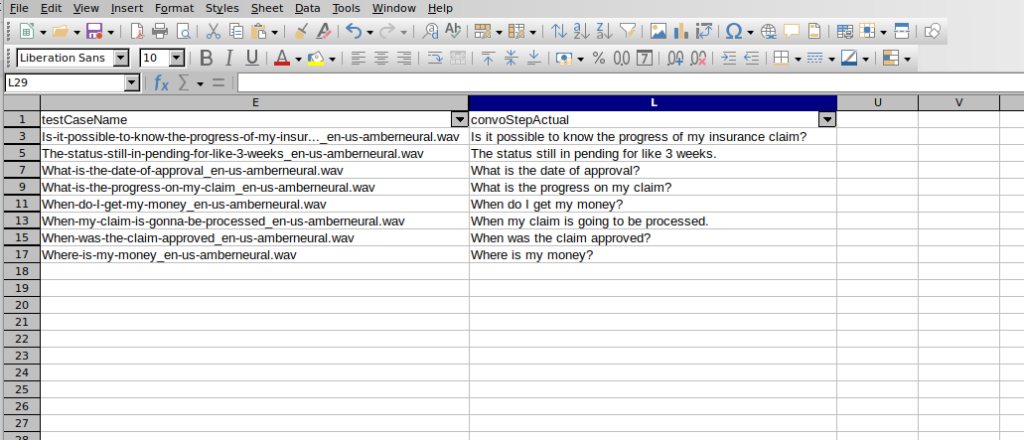
When now switch the Audio File Usage field to Use all audio files as Test Case input, and read transcription from the file, Botium will read the expected transcriptions from this file and any changes in the transcription for your reference files will popup up in the test results.